In this example, the preparation of a hexahedral finite element mesh for a 1 mm thickness free-form workpieces is considered.
1.You need to open the Gmsh software.
|
Information |
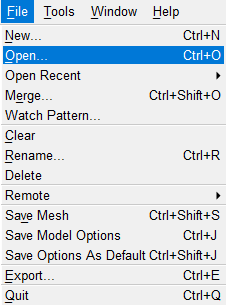
To work with the new geometry, you need to start work with a new file. To do this, you can use the feature File > New. |
|
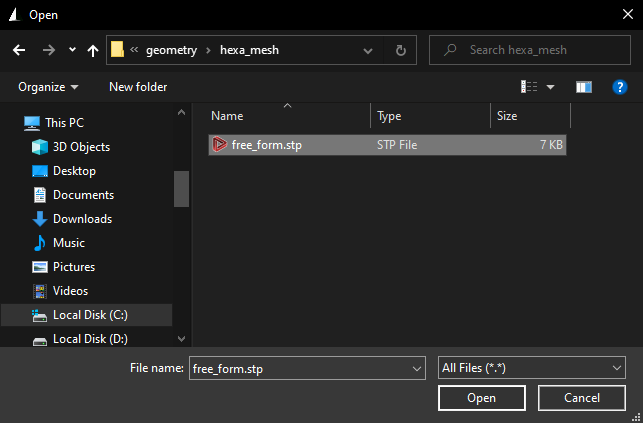
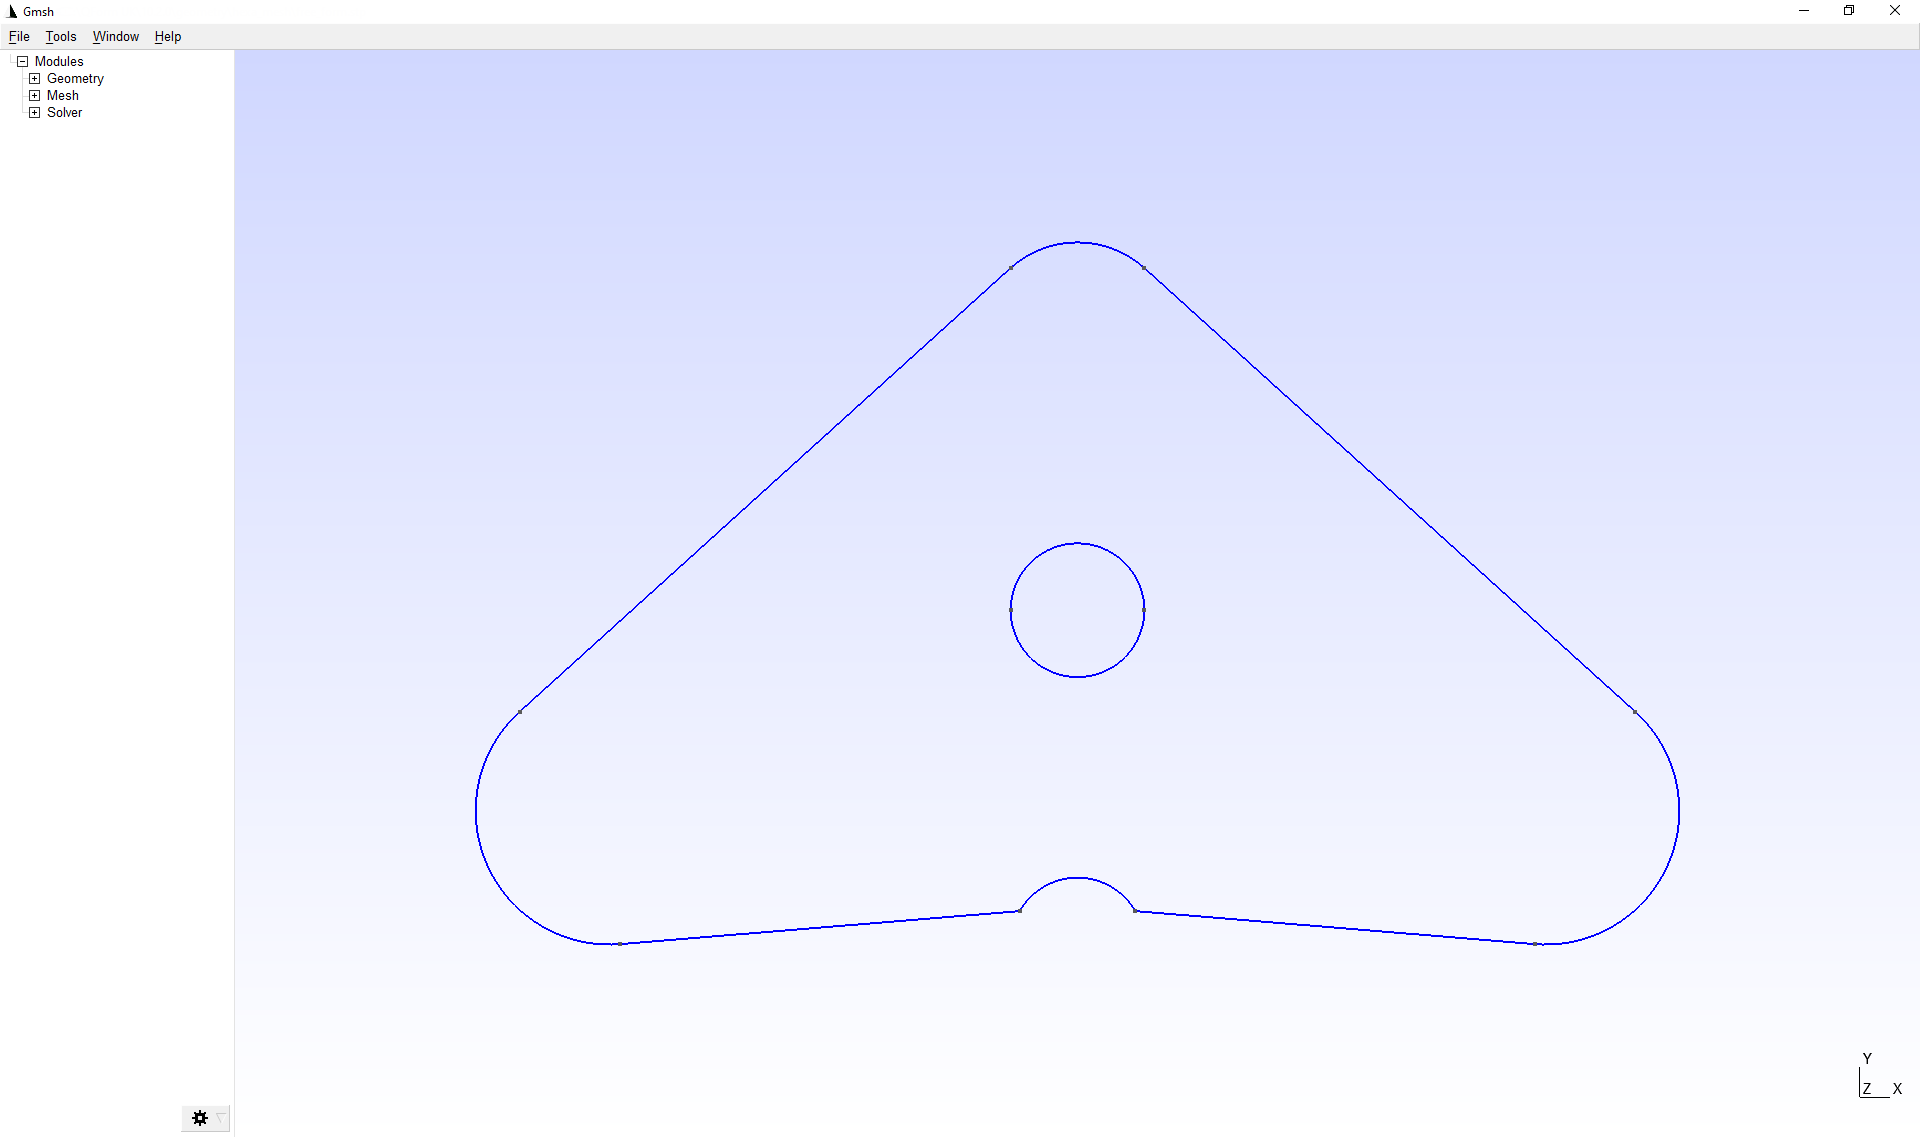
1.First of all, it is necessary to import contour of the workpieces, previously prepared in the CAD software. To do this, use the feature File > open. Then, in the window that opens, you must select a pre-prepared file in the format *.stp, containing only a plain surface that repeats the shape of the workpieces. Path to the geometry file for this example C:\QForm UK\12.0.1\geometry\hexa_mesh\free_form.stp.
|
Information |
TheGmsh software does not support importing the*.dxf format files . |
|
|
Information |
In theGmsh software the SI measurements system is used, i.e. distance is indicated in meters. |
|
|
|
After import, the workpieces contour will be displayed in the applications window.
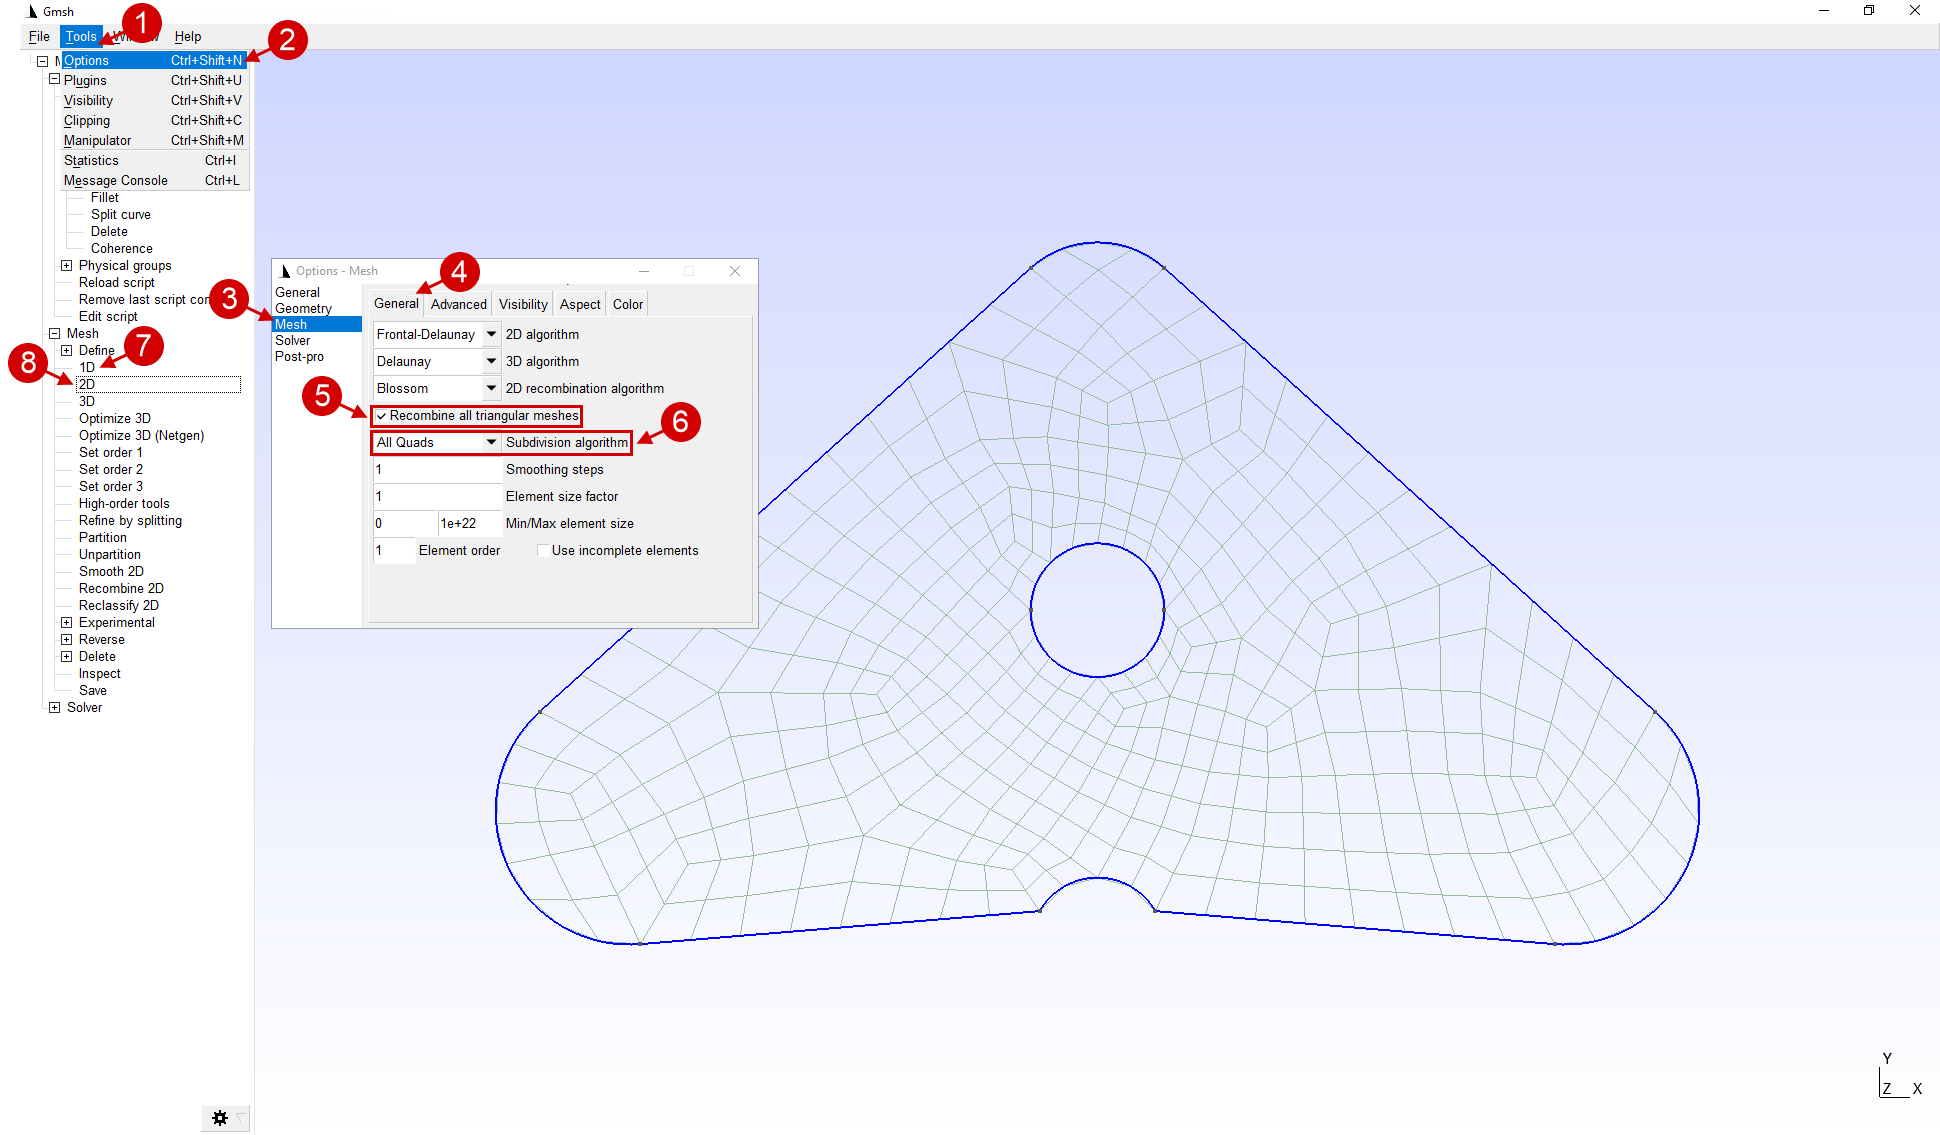
2.In the applications parameters Tools > Options > Mesh > GeneralRecombine all triangular meshes must be activated . Also, for the subdivision algorithm parameter select All Quads. The options window can be kept open. To create a flat finite element mesh, use the Mesh > 2D feature.
|
Information |
When using the different combinations of options and meshing algorithms, it is possible to obtain the desired calculation mesh. |
|
|
Important |
Options are applied only to the currentGmsh software window. Every time you start theGmsh software all features are reset to default values. |
|
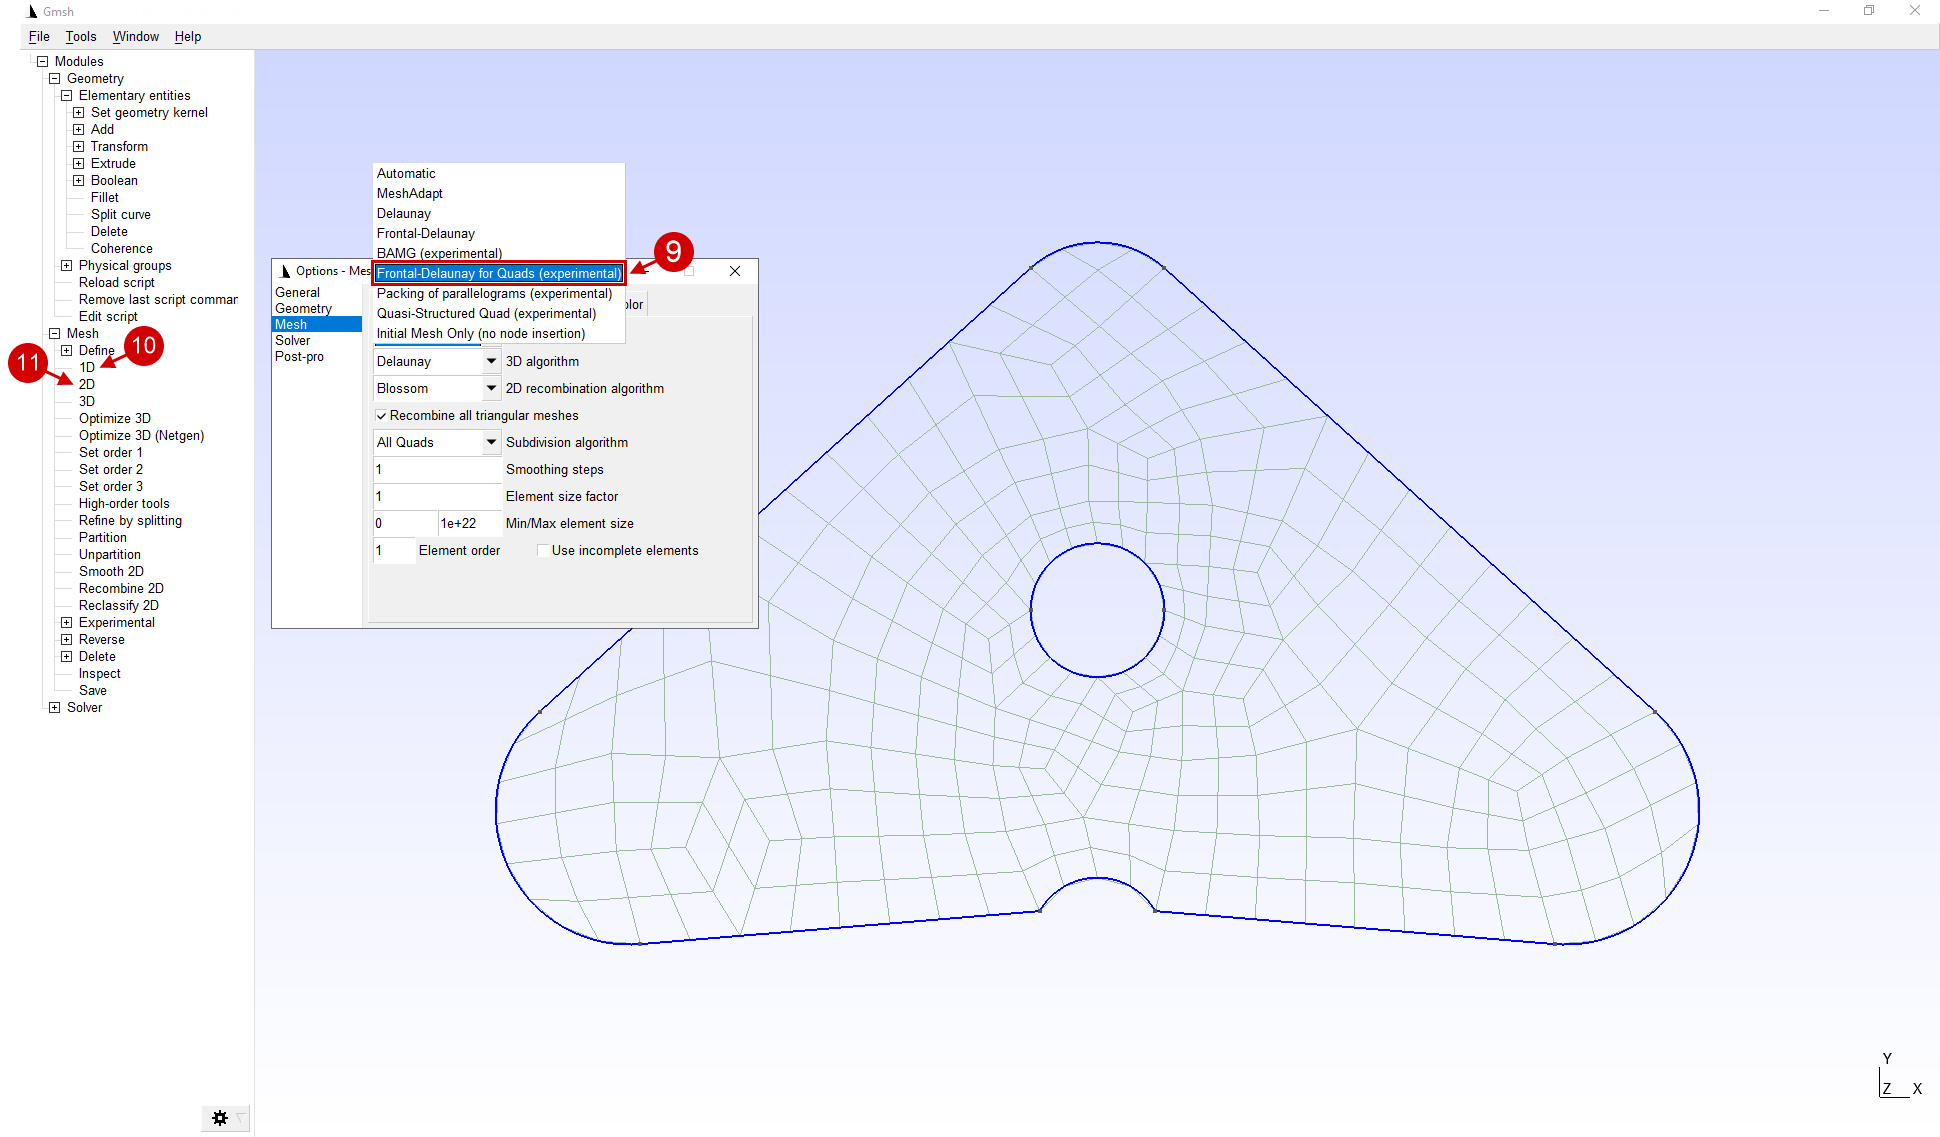
3.It is possible to build another calculation mesh by choosing a different algorithm. For example, for 2D algorithm select Frontal Delaunay for Quads. To rebuild the finite element mesh, you must sequentially activate the feature Mesh > 1D, Mesh > 2D.
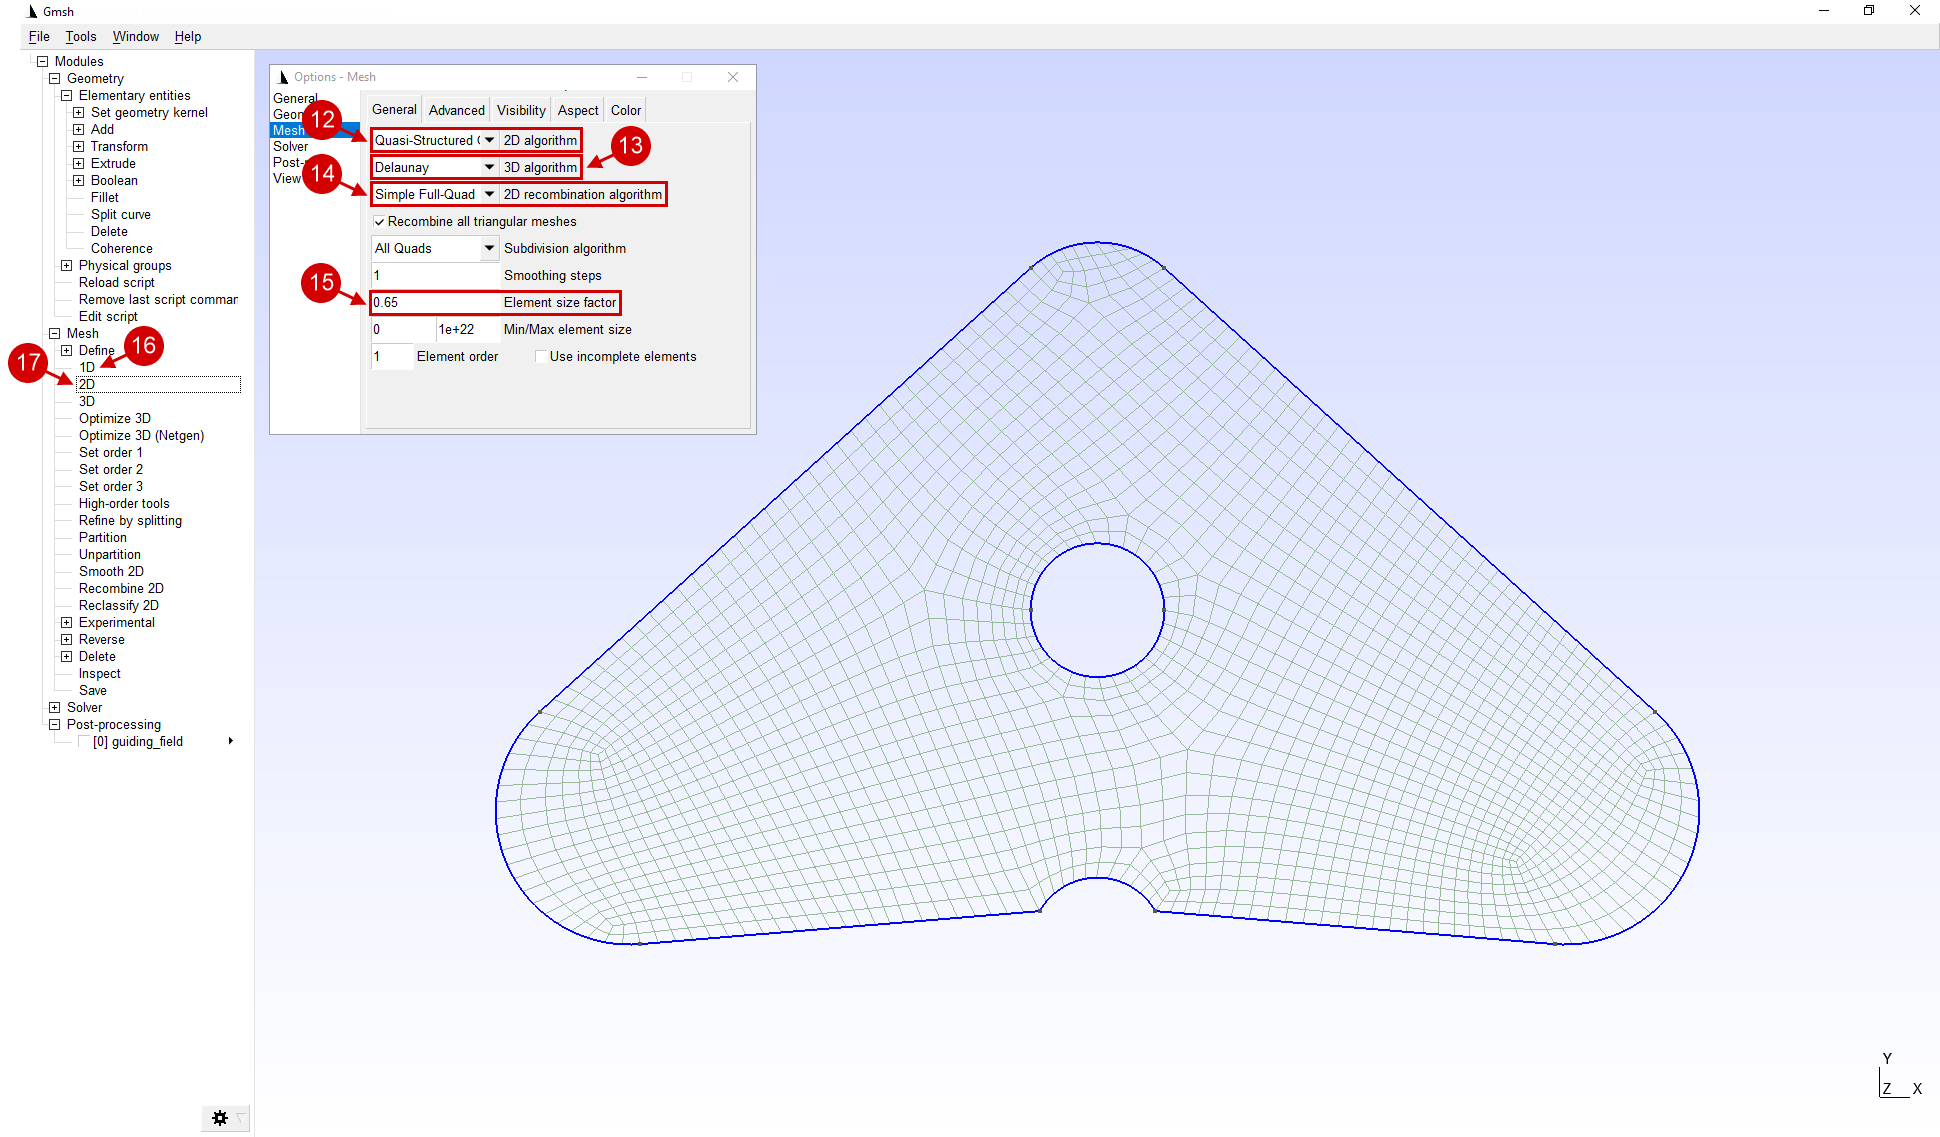
4.For this workpiece, please choose 2D algorithm > Frontal-Delaunay for Quads, 3D algorithm > Delaunay, 2D recombination algorithm > Simple Full Quad, Element size factor > 0.65. To rebuild the finite element mesh, you must sequentially activate the feature Mesh > 1D, Mesh > 2D. After completing all the manipulations, the options window can be closed.
|
Important |
QForm supports the import of only computational meshes consisting of elements of the same dimension. If the calculation mesh consists of elements of different dimensions, for example, 2D and 3D elements, then when importing into QForm an error occurs. |
|
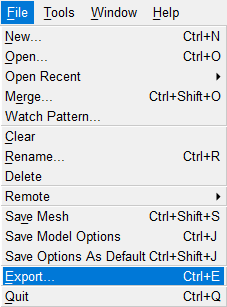
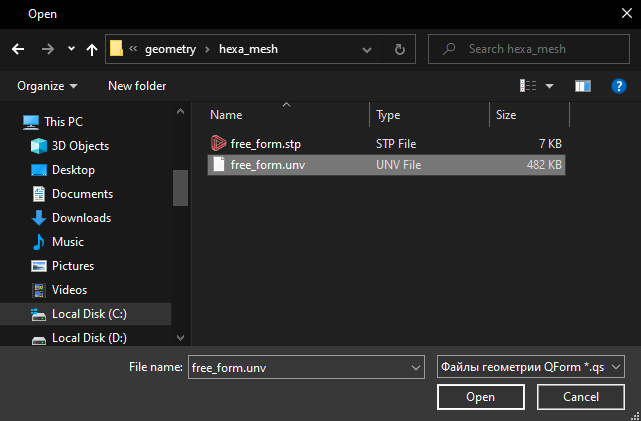
5.The Mesh is ready for export. For correct importing of the generated mesh in QForm it must be exported in the *.unv format. To do this, in the file tab use the Export feature.
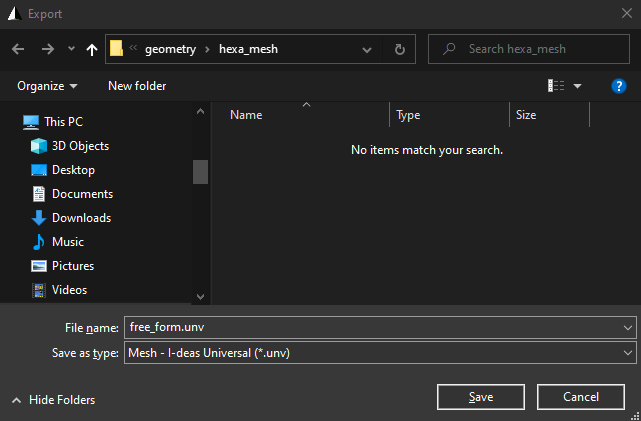
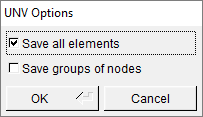
6.In the window that opens, set the file name (be sure to include the extension in the file name *.unv) and choose file Type > Mesh-I-deas Universal. Next click Save. In the opened window UNV Options choose Save all elements and press OK.
|
|
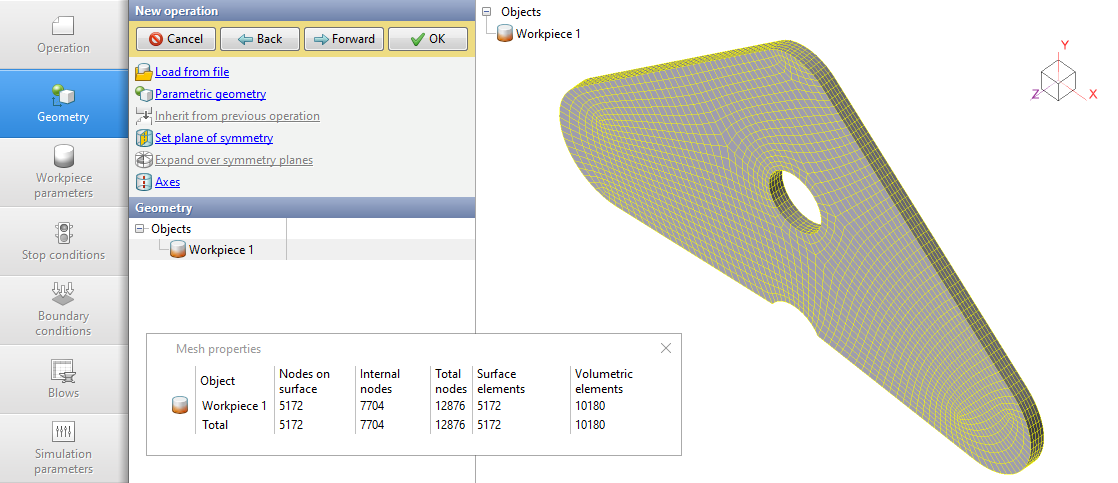
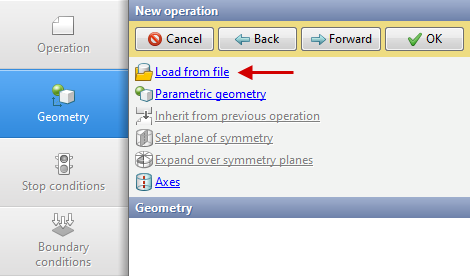
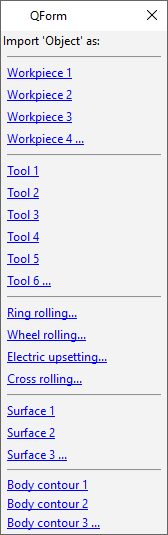
7.The Mesh is ready to be imported into QForm UK. To do this, in the Geometry tab you need to click Load from file and select the exported file. Next, in the window that appears, select the name of the object, for example, Workpiece 1.
|
|
|
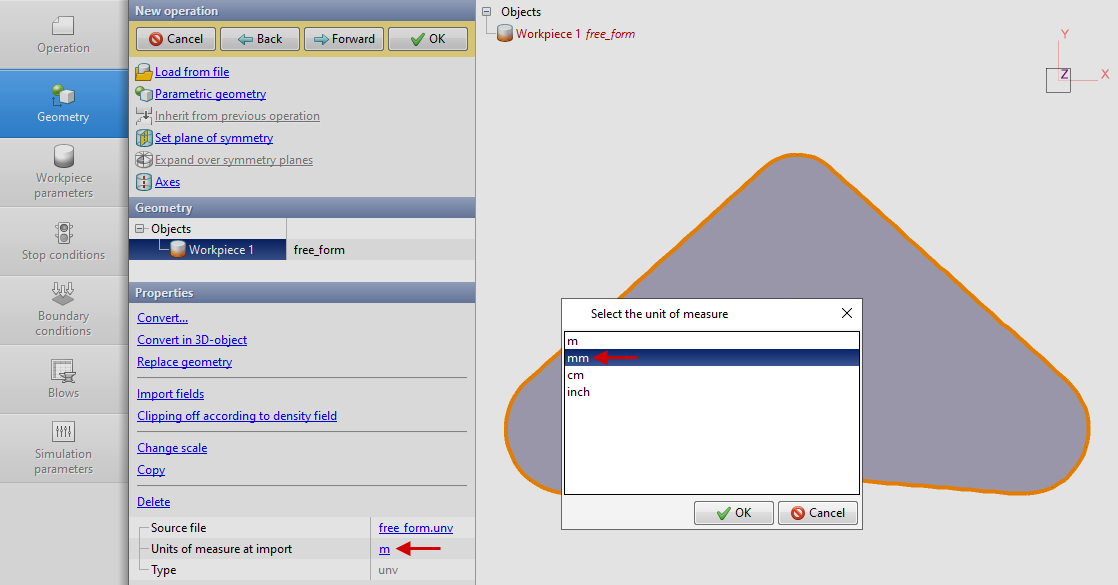
8.When loading the mesh, you need to change the units of measurements to mm. This can be done by selecting the feature Units of measure at import in the journal or by selecting the loaded mesh and clicking on measurements Units in the window Properties. After converting, it is possible zomm out the loaded mesh to the results window size ***with the commands Zoom to fit on Toolbar.
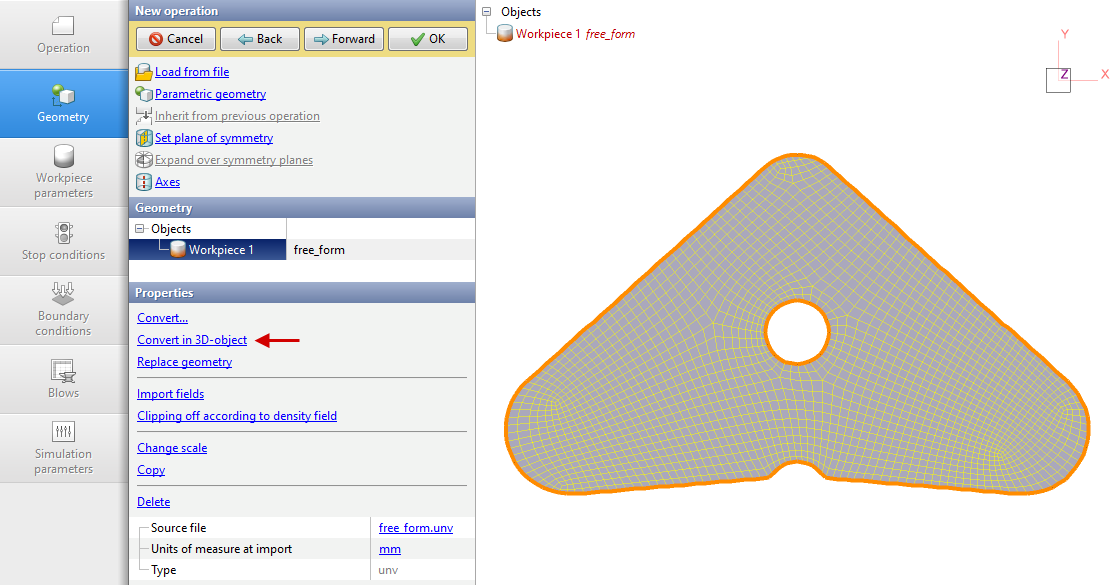
9.To run a simulation, the loaded two-dimensional mesh must be convert to a three-dimensional one. This can be done by selecting the feature Convert to 3D object in the Properties window.
10.We indicate Number of layers equal 5 and Thickness equal to 1 mm.

|
Information |
To achieve the best simulation results for most cases, it is recommended to set Number of layers equal to at least 5. |
|
11.The loaded mesh is ready for simulation.