When working with the API, the user can communicate with an open project in QForm UK via App Wizard or call the application via written code.
Below is a test case project of the first operation couple 2D-3D strain problem in S-expressions using App Wizard.
All actions are performed in the same order as when creating a project manually. After running the program and calling the Application Wizard, the first step is the creation of the operation (as with QForm UK).
1. In category Operation select the function operation_create.
Set the value of the argument id = 1 - first operation. In the name line, enter the name of the operation - " Operation 1 ".
1 2 3 4 5 |
|
(operation_create ( id 1) ( name "Operation 1") ( parent 0) ( creation_mode CreateAsNewProcess)) |
After executing the function with the Invoke button, the first operation in the process appears.
2. As the default problem type is 3D, change it to 2D axisymmetric. In order to change the problem type, you need to call the property_set* function. An asterisk at the end of the command means that this property must be set through the interface as follows:
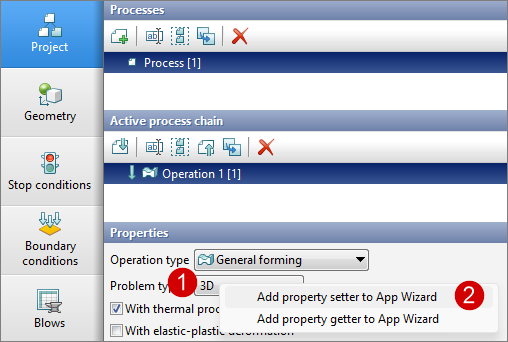
Step 1 - right-click on the required property - problem type.
Step 2 - add the properties setting code to the application Wizard.
Next you need to open App Wizard and change the property value to axis.
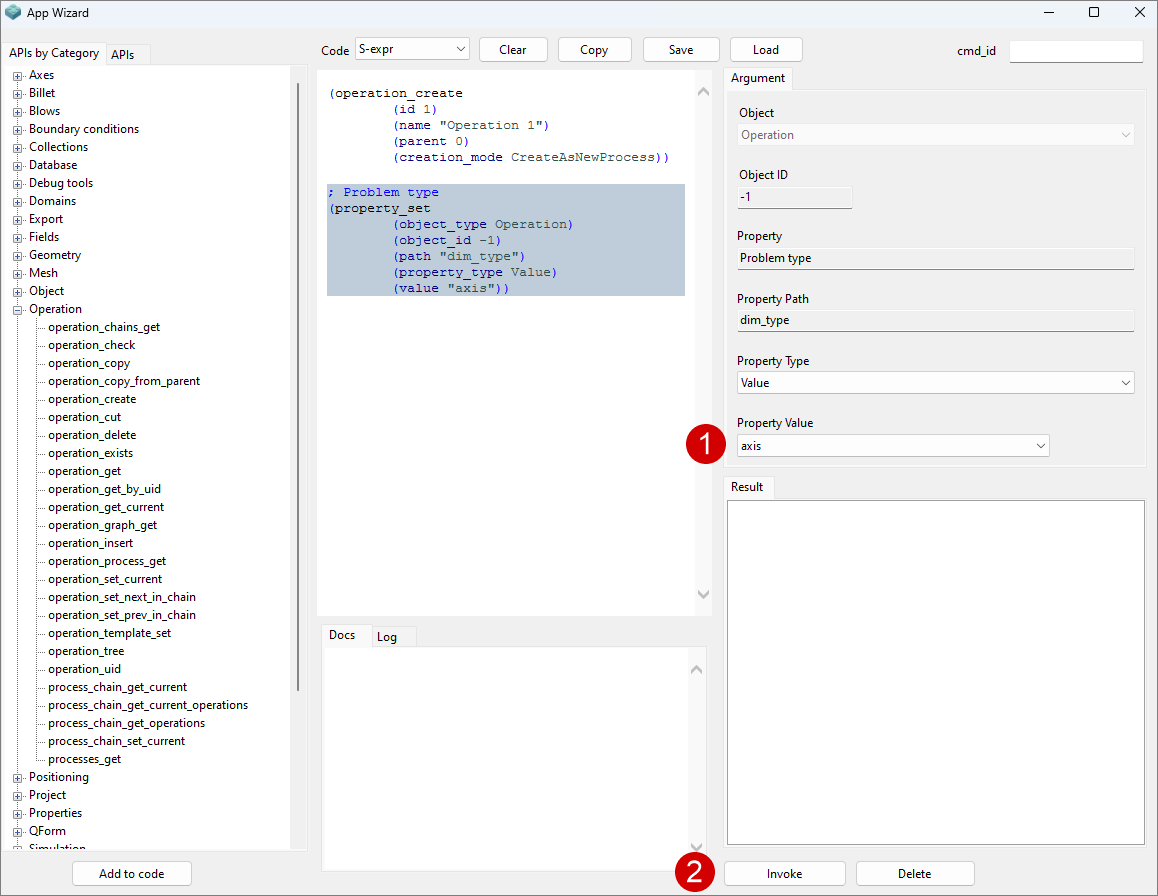
Click Invoke after making changes.
1 2 3 4 5 6 7 |
|
; Problem type (property_set ( object_type Operation) ( object_id - 1) ( path "dim_type") ( property_type Value) ( value "axis")) |
3. Load the geometry of objects using the geometry_load function.
1 2 |
|
(geometry_load ( file "C:\QForm UK\12.0.1\ geometry\cover\cover_op1.dxf")) |
As a result of executing this function, the geometry of objects for simulation will be displayed in the main window of the program.
4. Set the material and temperature for the workpiece.
Сall the property_set* function for material and temperature as in the second step.
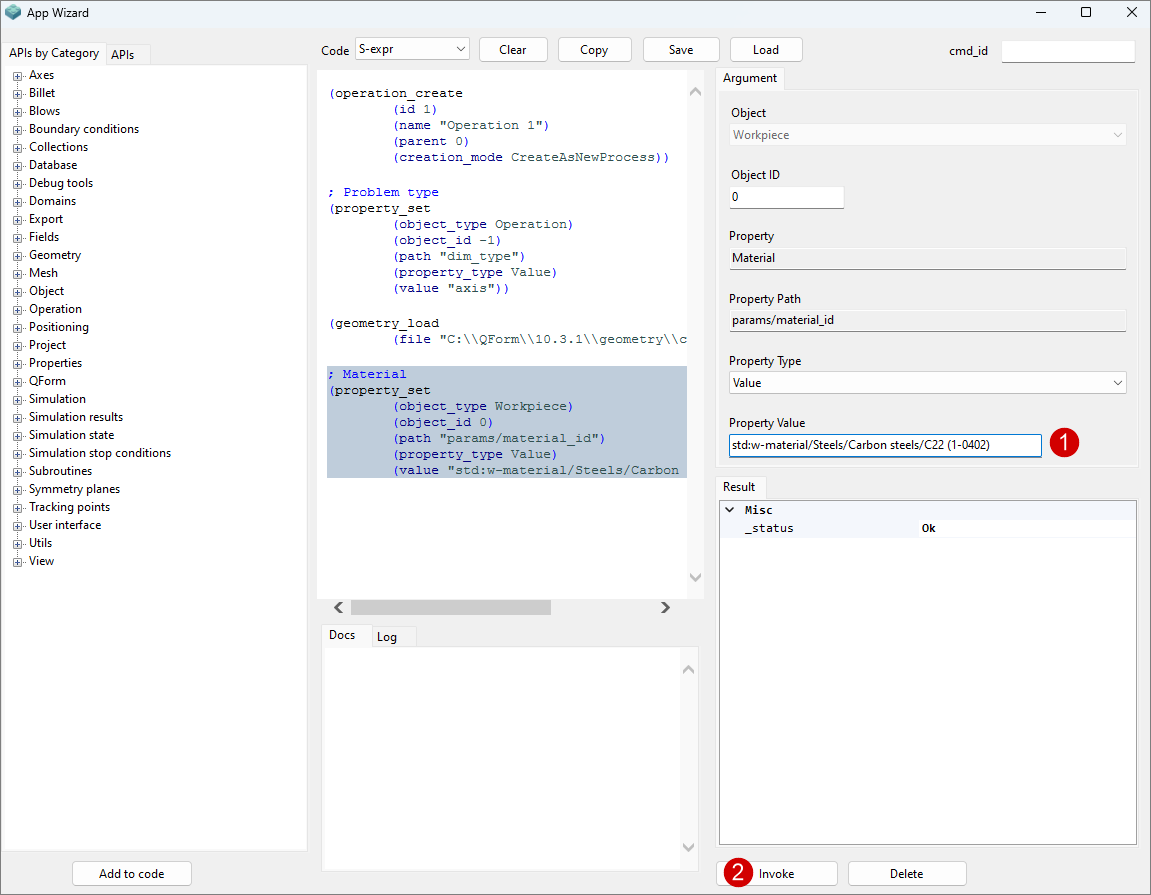
Specify the path to the file with the material properties data. In this case, for steel C22 from the standard database, you must enter std:w-material/Steels/Carbon steels/C22 (1-0402).
1 2 3 4 5 6 7 |
|
; Material (property_set ( object_type Workpiece) ( object_id 0) ( path "params/material_id") ( property_type Value) ( value "std:w-material/Steels/Carbon steels/C22 (1-0402)")) |
Specify the value of 1200 degrees for temperature.
1 2 3 4 5 6 7 |
|
; Temperature (property_set ( object_type Workpiece) ( object_id 0) ( path "params/temperature") ( property_type Value) ( value "1200")) |
5. Set the drive, lubricant, material and temperature for the tools. Right click the property_set* function to specify the properties of the tools similarly to the previous paragraph. When requesting to add a property for general column for all tools, such as Lubricant, App Wizard outputs the functions for each tool at once.
The functions for setting the parameters of the first tool are given below.
1 2 3 4 5 6 7 8 9 10 11 12 13 14 15 16 17 18 19 20 21 22 23 24 25 26 27 28 29 30 31 |
|
; Drive (property_set ( object_type Tool) ( object_id 1) ( path "drive_id") ( property_type Value) ( value "std:drive/Mechanical press/25MN"))
; Lubricant (property_set ( object_type Tool) ( object_id 1) ( path "params/lubricant_id") ( property_type Value) ( value "std: lubricant/Hot forging/Steels/Graphite + water"))
; Material (property_set ( object_type Tool) ( object_id 1) ( path "params/material_id") ( property_type Value) ( value "std:t-material/L6 HRC42"))
; Temperature (property_set ( object_type Tool) ( object_id 1) ( path "params/temperature") ( property_type Value) ( value "150")) |
After setting the properties, you need to activate the coupled tools simulation by changing the value of the function false on true.
1 2 3 4 5 6 7 |
|
; Coupled tools simulation (property_set ( object_type Tool) ( object_id 1) ( path "params/plastic_task") ( property_type Value) ( value "true")) |
6. Specify the final distance between the tools in the Stop conditions tab. Use the stop_cond_create_distance command.
1 2 3 4 5 6 7 |
|
(stop_cond_create_distance ( id 1) ( distance 22) ( object_1_type Tool) ( object_1_id 1) ( object_2_type Tool) ( object_2_id 2)) |
7. To simulate the coupled strain, the fixtures in the tools in the Boundary conditions tab should be set.
The algorithm for creating a boundary condition for one tool is given below.
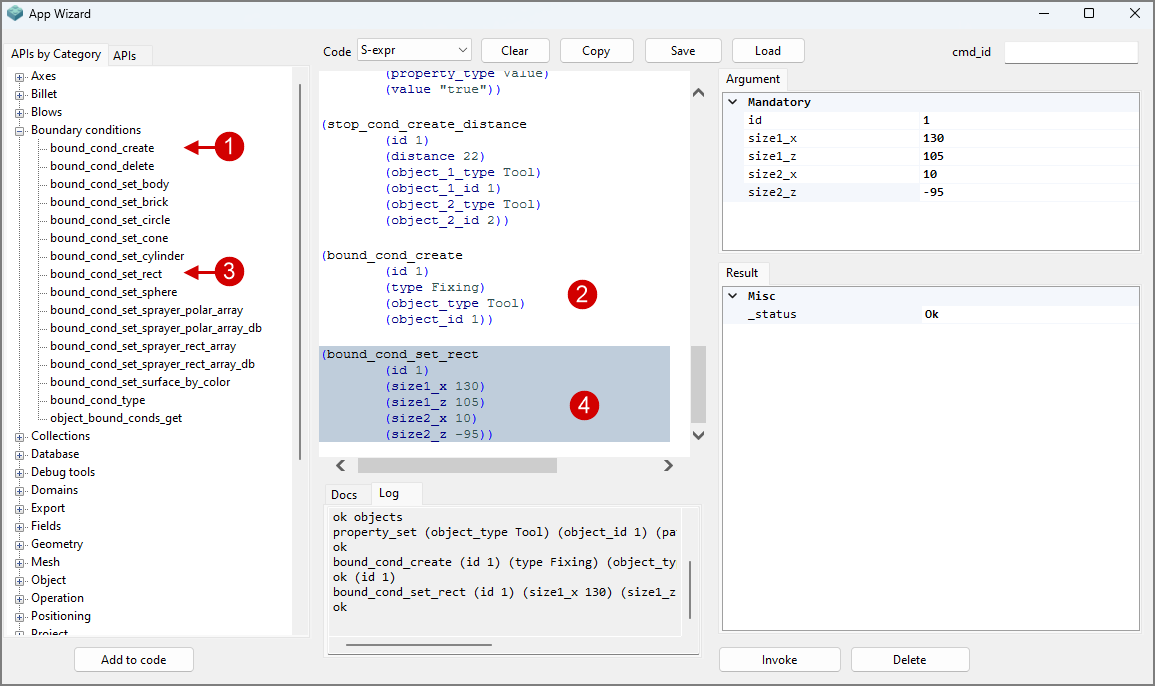
Step 1 - select and add the bound_cond_create command.
Step 2 - specify the type of boundary condition (Fixing), its identification number (id = 1), and don't forget to specify the object to which the boundary condition will be applied (Tool 1).
Step 3 - select and add the bound_cond_set_rect command.
Step 4 - input the identification number of the boundary condition for which a brick shape should be specified (id = 1), as well as its dimensions. The rigid fixing coordinates are selected so that the rigid fixing geometry intersects the part of the tool being fixed.
Click Invoke after making changes at each step.
1 2 3 4 5 6 7 8 9 10 11 12 |
|
(bound_cond_create ( id 1) ( type Fixing) ( object_type Tool) ( object_id 1))
(bound_cond_set_rect ( id 1) ( size1_x 130) ( size1_z 105) ( size2_x 10) ( size2_z -95) |
8. Specify the value of the pre-cooling time of the workpiece in air and on tool in the Blows tab.
To do this, use the blow_parameter_set command 2 times.
1 2 3 4 5 6 7 8 9 10 11 |
|
(blow_parameter_set ( blow 1) ( param CoolingInAir) ( stop_condition 1) ( value 5)
(blow_parameter_set ( blow 1) ( param CoolingInTool) ( stop_condition 1) ( value 2) |
9. Before starting the simulation, save the project directly in the main programm itself or by using the project_save_as command.
Specify the project path with the file name for the project_save_as command It is important to specify the extension in the file name *.qform. For example, C:\QForm UK\12.0.1\simulation\cover\cover_API.qform.
The simulation is started by the start_simulation command.
1 2 3 4 |
|
(project_save_as ( file "C:\QForm UK\12.0.1\ simulation\cover\cover_API.qform")
(start_simulation) |
All code from the design window can be saved in the *.scm format using the Save button.
10. Subsequent operations can be created in the same way.